
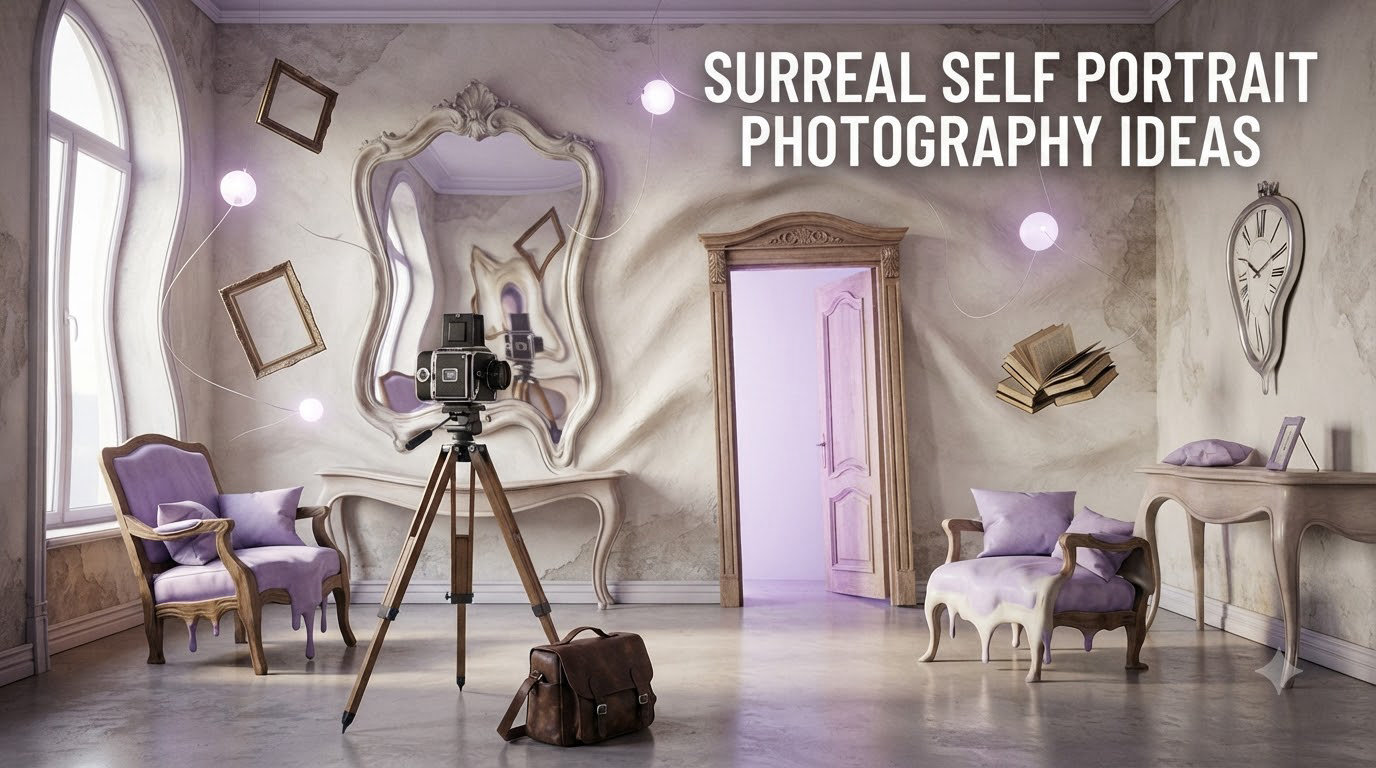
Surreal self portrait photography is a creative genre that combines self-portraiture with surrealist art principles, using techniques like double exposure, photo manipulation, unusual props, and dreamlike compositions to make otherworldly images that go far beyond realistic representation. In this guide, I share 18 surreal self portrait photography ideas you can try at home, in the studio, or outdoors, plus the techniques, lighting, and editing tools that make each effect work.
I’ve spent the last three years shooting weekly surreal self-portraits in my apartment, in the woods near my home, and on weekends with friends acting as assistants. I’ll walk you through the exact ideas that produced my strongest images, the mistakes that cost me hours, and the cheap tricks that made the biggest difference. Whether you have a DSLR, a mirrorless camera, or just your phone, you’ll find something here you can shoot this week.
Table of Contents
What Is Surreal Self Portrait Photography? (Quick Definition)
Surreal self portrait photography is a hybrid genre where the photographer steps in front of the camera and uses surrealist visual strategies to create images that feel dreamlike, impossible, or symbolic. You start with the basics of self-portraiture (a tripod, timer, or remote) and layer on surrealist techniques like visual paradoxes, unexpected scale, photo manipulation, double exposure, and conceptual props inspired by artists like René Magritte and Salvador Dalí.
What separates a surreal self-portrait from a regular self-portrait is intent. A regular self-portrait aims to document your likeness, mood, or environment. A surreal self-portrait aims to question, distort, or reimagine reality. The result is a frame that asks the viewer to think twice, the way Magritte’s “The Son of Man” does with its floating apple.
A Brief History of Surrealism in Self-Portrait Photography
Surrealism began as a literary movement in 1924 with André Breton’s Surrealist Manifesto, but it quickly migrated into visual art. Photographers like Man Ray and Claude Cahun were already exploring the self-portrait through distortion, masquerade, and gender play in the 1920s and 30s. Cahun, in particular, used costume, makeup, and cropping to create what we now recognize as proto-surreal self-portraits.
Fine art photographers in the 1970s and 80s, including Cindy Sherman and Francesca Woodman, pushed the genre further by dressing as characters and staging entire scenes. Sherman became famous for her Untitled Film Stills, where she was both photographer and subject, performing fictional identities. Woodman shot in abandoned houses, blurring her body into walls and doorways so that the figure felt like a ghost.
Today, surreal self-portrait photography lives on Instagram, 500px, and in fine art prints. Modern creators like Ben Zank and Jovana Rikalo continue the tradition with Photoshop composites, masks, and dreamlike environments. The genre is thriving because the tools are accessible and the canvas is unlimited.
What Makes a Self-Portrait Surreal (And What Doesn’t)
A self-portrait is surreal when it bends at least one rule of how we expect reality to look. The most common surrealist strategies in photography include visual paradox, unexpected scale, dreamlike atmosphere, and symbolic substitution.
- Visual paradox: an object placed where it shouldn’t be, like an apple floating in front of your face (the Magritte move).
- Unexpected scale: a tiny figure in a giant landscape, or a giant hand reaching toward a tiny you.
- Dreamlike atmosphere: mist, smoke, fog, long-exposure motion blur, or soft focus.
- Symbolic substitution: replacing a body part with an object (a clock face where your face should be, flowers growing from your shoulders).
- Disorientation: upside-down framing, reflections, mirrors, or double exposures that confuse spatial logic.
A self-portrait is not necessarily surreal just because it’s moody, black and white, or shot with dramatic lighting. Those traits alone produce fine art portraiture, but they don’t break the rules of reality. Add one of the elements above and you cross into surreal territory.
How to Plan a Surreal Self-Portrait (Concept and Mood Board)
The biggest difference between my first 50 surreal self-portraits and the ones I shoot now is the planning stage. I used to grab a prop, stand in front of the camera, and hope something interesting happened. Now I spend 30 minutes building a small mood board before I ever unpack the tripod.
Here’s the workflow that works for me. First, write a single sentence describing the feeling or story you want to communicate. Examples: “the loneliness of a city at 3 a.m.” or “what it feels like to wake up inside a painting.” Second, collect 5 to 10 reference images into a folder on your phone: a color palette, a texture, a pose, a prop, a backdrop. Third, sketch the frame, even roughly, on paper. You don’t need to be good at drawing. Just place a stick figure, your prop, and your light source.
This sounds slow, but it actually saves time. When I’m on set, I know exactly what to test first instead of guessing. Photographers on r/surrealism consistently say the same thing: concept beats gear, every single time.
18 Surreal Self Portrait Photography Ideas to Try This Year
Here are 18 surreal self portrait photography ideas, each with the technique behind it and a quick setup note. Pick three that match the props you already own and shoot them this weekend.
- Floating object illusion. Hold an object (apple, book, flower) on a thin invisible string or have a friend hold it on a stick that you’ll clone out later. The result feels like Magritte.
- Mirror within a mirror. Place two mirrors at right angles and shoot into the corner. Your reflection multiplies into infinity.
- Tiny you, giant world. Use forced perspective. Stand far from the camera while a friend holds a giant prop (a leaf, a paper boat) close to the lens. Crop tight on you so you look miniature.
- Underwater portrait. Shoot in a bathtub, pool, or even a clear storage tub filled with water. Use a waterproof phone case or a cheap action camera for sub-surface angles. Hair and fabric drifting in water do the surreal work for you.
- Double exposure face and nature. In camera (most mirrorless cameras have a multiple exposure mode) or in Photoshop, layer your portrait with a forest, clouds, or city skyline so both blend into a single frame.
- Floating horizontally. Lie on a bench or bed covered with a sheet that matches the wall behind you. Crop so the surface disappears. You appear to hover.
- Smoke bomb portrait. Use a single colored smoke bomb (Enola Gaye or similar) outdoors with the wind at your back. Wear simple clothes so the smoke does the storytelling. Always check local fire rules and stand upwind.
- Light painting silhouette. Set a 10 to 30 second exposure in a dark room. Use a flashlight to paint light around your silhouette while the shutter is open.
- Window into another world. Hold a framed picture, tablet screen, or printed photograph in front of your chest so it looks like a window into another scene. Line up the image so it visually connects to the background behind you.
- Shadow self. Shoot your shadow as the subject. With strong low sun, your shadow can stretch across a wall, floor, or hillside and become the “character” in the frame.
- Body of water reflection. After rain, lay down on wet pavement and shoot your reflection. Crop out the pavement edges and you appear to float in a sky you made yourself.
- Wrapped in fabric. Drape a long sheet, tulle, or curtain around your head and shoulders so it billows like a ghost or a wedding veil in a dream.
- Flower field face mask. Hold a bundle of flowers, leaves, or wheat directly in front of your face so only your eyes show, or use photo editing to mask your face with the same flowers from the background.
- Multiple selves. Use interval timer mode and walk into different parts of the frame between exposures. Composite the frames in Photoshop so several versions of you coexist.
- Black liquid pour. Slowly pour black paint, ink, or even dark coffee over your face from a cup above your head. Shoot with a flash to freeze the splash. Do this outside and wear old clothes.
- Behind glass distortion. Shoot through a textured shower door, a sheet of crumpled plastic wrap, or a glass block. The distortion turns your features into a Cubist painting.
- Long exposure motion. Set a 2 to 4 second exposure. Stand very still for the first second, then blur across the frame during the rest. You become a ghost in your own photo.
- Everyday object crown. Replace your head with an object you love (a lamp, a houseplant, a stack of books) using Photoshop Generative Fill, Luminar Neo, or simple cut-and-paste. The result reads as instantly surreal.
If you only have a phone, ideas 1, 4, 5, 9, 11, 13, 15, and 18 all work with a tripod phone mount and a free editing app. I’ll cover that workflow later in the guide.
Essential Equipment for Surreal Self-Portraits
You can start with very little, and add gear only when an idea demands it. Here’s the practical kit list that has produced hundreds of my surreal self-portraits.
Camera basics: any camera with a self-timer, interval timer, or Bluetooth remote. That includes every modern smartphone, every entry-level DSLR, and every mirrorless camera made in the last decade. A flip screen helps with framing but isn’t required.
Stability: a tripod. Even a cheap one is fine. The reason is simple: when you’re posing 10 feet away, a handheld selfie crop will not look surreal, it’ll look like a selfie. The tripod is what turns the image into a portrait.
Remote trigger: a wired remote, infrared remote, or phone app. The smallest camera shake during a long exposure will blur your face, which you usually don’t want.
Light: at minimum, one window and one lamp. Add a small LED panel or a speedlight when you start experimenting with gels and colored backgrounds.
Props: household items. Sheets, mirrors, fruit, books, fabric, smoke bombs, flashlights. Skip the shopping trip; raid the kitchen first.
Editing software: free options include Snapseed, Darkroom (mobile), GIMP, and Photopea. Paid options include Adobe Lightroom, Photoshop, Luminar Neo, and the AI features inside Affinity Photo 2.
Lighting Techniques That Make Self-Portraits Feel Otherworldly
Lighting is the cheapest special effect in photography. A single colored gel on a flashlight or LED panel can transform a boring shot into a surreal one. Here are the four lighting setups I use most.
Hard side light: a single window or lamp at 90 degrees to your face. The strong shadow on the far side of your face creates drama that automatically reads as fine art and slightly unreal.
Backlight with rim glow: place the light source behind you. Your edges light up, your face falls into shadow, and the result feels cinematic and dreamy. Add a little fog or smoke to push it further.
Colored gels: a $10 pack of lighting gels from any photo store gives you red, blue, green, and magenta. Hold one in front of your flash or LED panel. One color on the subject and another color on the background is a classic surrealist setup.
Light painting: in a dark room with a 10 to 30 second exposure, walk a flashlight around your body or paint streaks of light behind you. You’ll appear partially illuminated and partially ghosted in the same frame.
If you only have natural light, shoot during golden hour (the hour after sunrise or before sunset) and during blue hour (the 20 minutes after sunset). The color temperature alone makes images feel otherworldly.
Composition and Color Theory for Surreal Portraits
Composition is the silent partner of every surreal effect. Even a great concept can fall flat if the framing is awkward. Two rules to remember: the rule of thirds and the 20-60-20 cropping rule.
The rule of thirds divides your frame into a 3 by 3 grid. Place your eyes on the upper third line, not in the center of the frame. Centered framing tends to read as formal or stiff; off-center framing reads as intentional and dynamic, which fits the surreal mood.
The 20-60-20 rule is a quick cropping guide. Aim for the top 20% of the frame to be clean space (sky, fog, blank wall), the middle 60% to contain your subject and the main action, and the bottom 20% to ground the image (floor, foreground texture, shadow). This ratio produces compositions that feel balanced without feeling symmetrical.
For color theory, surrealist images lean on three palettes. Monochromatic (one color family with shifts in lightness), complementary (opposites on the color wheel like orange and blue), and triadic (three evenly spaced colors like red, yellow, blue). Pick one palette per shoot so the color does the storytelling instead of fighting for attention.
Editing and Post-Processing for Surreal Effects
Editing is where surreal self-portraits often go from “interesting idea” to “finished piece.” I treat editing as the second half of the shoot, not an afterthought. Here are the techniques that give the biggest surreal payoff, ranked by how often I use them.
Mask replacement: hide the face with leaves, water, smoke, or any texture from elsewhere in the frame. In Photoshop, use a layer mask with a soft brush. In mobile apps, the same effect takes three taps in Snapseed’s healing tool.
Composite multiple exposures: shoot two self-portraits on a tripod (one of you, one of an empty scene) and blend them in Photoshop. Lower the opacity of the top layer, add a soft light blend mode, and you have a double exposure in five minutes.
Generative Fill (AI): Adobe’s Generative Fill in Photoshop (and similar features in Luminar Neo and Affinity Photo 2) lets you select an area and describe what you want there. Replace a blank wall with a window into space. Replace your head with a flock of birds. The AI does the masking for you.
Color grading: shift the entire image toward a single non-realistic hue. Drop a blue or teal grade on the shadows and a warm orange grade on the highlights and the photo immediately reads as cinematic.
Texture overlays: a low-opacity paper, fabric, or grunge texture blended on top of your image gives it a painterly, surreal finish. Free overlay packs are available from most photography blogs.
Selective dodge and burn: lighten the parts of your face and body that you want to draw the eye to, and darken everything else. This is the technique that makes surreal portraits feel sculpted rather than flat.
For mobile editors, my shortlist is Snapseed (free, powerful), VSCO (great film-emulation filters), and Lightleap by Lightricks (one-tap surreal looks). For desktop, Lightroom plus Photoshop covers 95% of what surreal self-portrait work needs.
DIY Surreal Self-Portrait Ideas You Can Shoot at Home
You don’t need a studio, expensive props, or even Photoshop to make surreal self-portraits at home. The constraint actually helps. A single room, a tripod, a window, and your phone are enough for a year of weekly surreal portraits.
Some of my favorite at-home surreal ideas: stand in front of a window with a sheet over your head so only your silhouette shows, with light pouring around you. Fill your bathroom with steam and shoot through the fog. Pour milk, water, or coffee into a clear glass bowl and shoot your face through it for distortion. Use a treadmill, an open closet, or your kitchen counter as the set.
A simple mood board for an at-home session: pick a single prop (a lamp, a sheet, a mirror), pick a single light source (one window), and shoot 30 frames in 20 minutes. Limit the variables so the surreal element stands out.
Surreal Self Portrait Photography Ideas With a Phone
Modern phones shoot raw, support manual exposure, and have time-lapse and portrait modes. That’s enough for almost every surreal idea in this guide. The two accessories that make the biggest difference are a small phone tripod (any $15 model works) and a Bluetooth remote, which together cost less than a single smoke bomb.
For double exposure on a phone, use the in-camera multiple exposure mode (available on most recent iPhones and Samsungs) or layer two photos manually in Snapseed’s double exposure tool. For light painting, switch to manual or “night” mode and use a flashlight to draw in the air during the long exposure.
Apps that punch above their weight for surreal phone work: Snapseed (free), VSCO (subscription), Lightleap (free tier), and Photomyne (AI masking). Avoid the temptation to download ten apps. Pick two and learn them well.
Building Confidence (and Staying Safe) Behind the Camera
Most beginners stall not at the camera, but at the moment of pressing the shutter alone. That awkwardness is the single biggest barrier to surreal self-portrait work, and it’s worth naming out loud.
Three things helped me. First, I started with faceless self-portraits. Shoot your back, your hands, your silhouette, your shadow. The image is still you, but the self-consciousness drops by half. Second, I batched shoots. I’d plan one idea, then take 40 to 100 frames in 30 minutes. Out of 100, only 2 or 3 are keepers, and that’s normal. Photographers on r/surrealism report the same ratio. Third, I used a Bluetooth remote instead of a 10-second timer. The shorter the delay, the more natural the pose.
For safety with smoke bombs, fireworks, or outdoor effects: check local fire regulations, stay upwind, never use indoors, keep a bucket of water nearby, and tell a friend where you’ll be. For Photoshop-based composites that put you in dangerous-looking situations (falling, drowning, hanging), keep the work clearly labeled as a composite so viewers don’t misread it.
6 Surreal Self-Portrait Photographers Worth Following
The fastest way to grow as a surreal self-portrait photographer is to study the artists who are already doing it well. Here are six I’d follow today.
- Ben Zank — known for faceless, deadpan surreal self-portraits in everyday environments. His book Nothing to See Here is a great place to start.
- Jovana Rikalo — Serbian fine art photographer whose pastel, dreamy self-portraits combine nature, fabric, and digital editing.
- Manu Pombrol — Madrid-based surrealist whose self-portraits mix classical painting references with photo manipulation.
- Brooke DiDonato — known for portraits where bodies blend into walls, floors, and fabrics so the figure feels half real, half painted.
- Justin Peters — surrealist who uses scale, levitation, and natural landscapes to create storybook-like self-portraits.
- Flora Borsi — Hungarian surrealist whose animal-merged self-portraits show how digital masking can read as fine art.
Spend 15 minutes looking through each artist’s portfolio before your next shoot. You’ll come away with at least two new ideas to try.
Frequently Asked Questions
What is surreal self portrait photography?
Surreal self portrait photography is a creative genre where the photographer is both the subject and the creator, using surrealist techniques like double exposure, photo manipulation, unexpected props, and dreamlike compositions to make images that bend the rules of reality.
How do I take a surreal self-portrait at home?
Pick one prop, one window for light, and a tripod. Plan a 30-minute shoot, take 40 to 100 frames, and try simple surreal moves like wrapping fabric around yourself, shooting through a glass of water, or replacing your face with a household texture in a free editing app like Snapseed.
What are 6 surrealist techniques used in photography?
The six most common are visual paradox (an object where it should not be), unexpected scale, dreamlike atmosphere (smoke, fog, motion blur), symbolic substitution (an object where a body part should be), double exposure, and disorientation through reflections or inverted framing.
Can I make surreal self-portraits without Photoshop?
Yes. Snapseed, VSCO, Photomyne, and Luminar Neo all handle masking, double exposure, and color grading. You can also shoot surreal effects fully in-camera using long exposure, light painting, colored gels, smoke bombs, mirrors, and physical props.
What is the rule of 3 in portrait photography?
The rule of 3 in portrait photography means dividing your frame into a 3 by 3 grid and placing the eyes on the upper third line. It produces more dynamic, intentional framing than centering the face, which fits the surreal mood better than formal symmetry.
What is the 20-60-20 rule in photography?
The 20-60-20 rule is a cropping guide. The top 20% of the frame is clean space, the middle 60% holds the subject and main action, and the bottom 20% grounds the image with foreground texture or shadow. It produces balanced compositions without feeling symmetrical.
Final Thoughts: Build Your Surreal Self-Portrait Series
The fastest way to improve at surreal self portrait photography is to commit to a series, not a single image. Pick a theme that means something to you: alter ego, dreams, seasons, fairy tales, or a single recurring prop. Shoot one frame per week for twelve weeks. By the end you’ll have a coherent body of work, not just scattered experiments.
Surreal self portrait photography ideas work because they let you be both the storyteller and the subject. The tools are accessible, the genre is forgiving of imperfection, and the only real limit is the concept. Start with one idea from this guide, shoot it this weekend, and see where it takes you.