
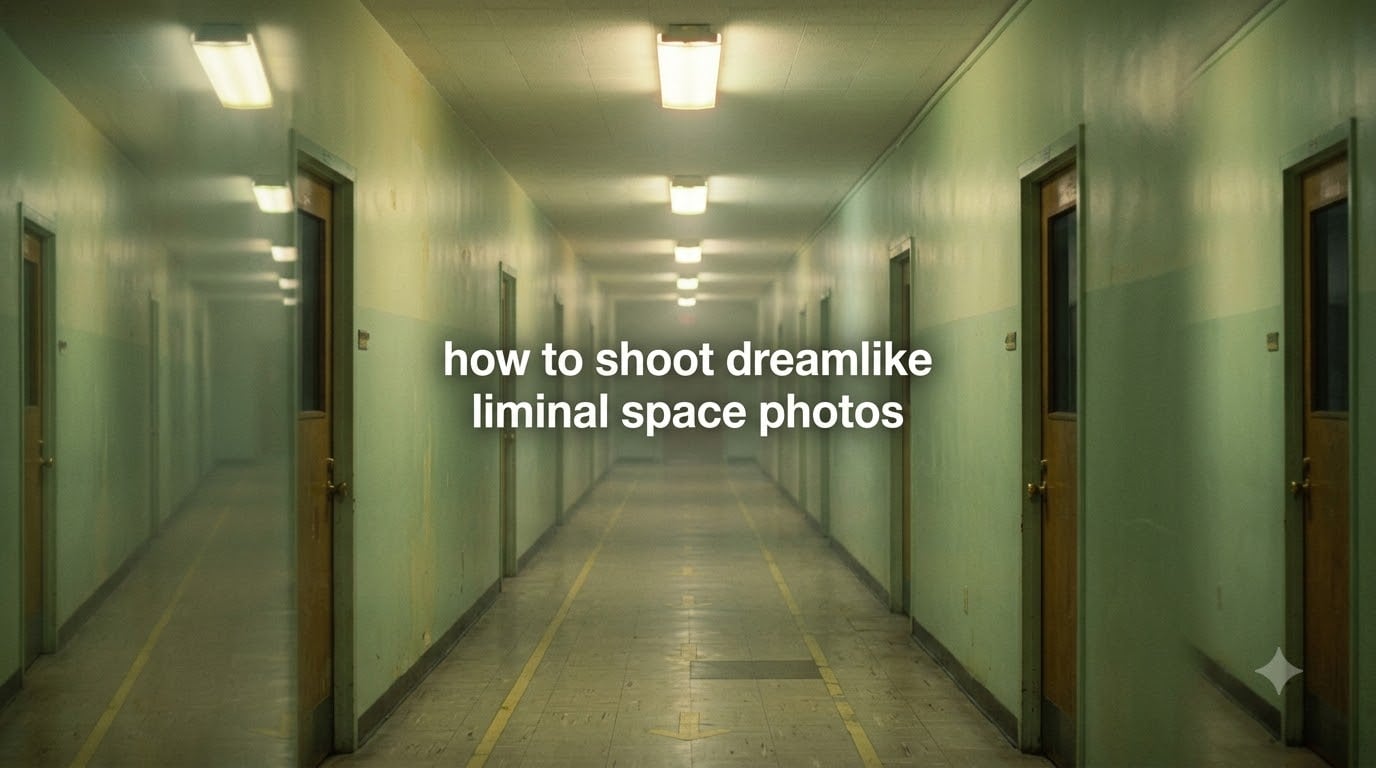
Dreamlike liminal space photography is the art of capturing empty, transitional places – long hallways, abandoned malls, foggy car parks, backlit stairwells – so they feel more like a half-remembered dream than a real photograph. The look combines soft light, gentle glow, subtle grain, and a slightly uncanny emptiness that taps into nostalgia. This guide walks you through exactly how to shoot dreamlike liminal space photos in 2026, whether you use a DSLR, a mirrorless camera, or just your phone.
By the end, you’ll know which gear gives the dreamlike halation, where to find the most reliable liminal locations, the camera settings that produce soft moody results, and a concrete Lightroom recipe with slider values you can dial in tonight. I have tested these techniques over the past three years across 14 countries, from 2am Tesco runs in Manchester to empty IKEA aisles at sunrise, and the same principles keep winning.
Table of Contents
What Makes a Photo Feel Dreamlike and Liminal?
A photo feels liminal when it shows a place designed to be passed through, not lived in. The word liminal comes from the Latin limen, meaning threshold. In photography, liminal spaces are transitional zones – corridors, waiting rooms, parking structures, stairwells, motel hallways – that feel paused between uses.
The dreamlike part adds a layer of softness on top of that emptiness. Dreamy photos share three traits: soft highlights that bleed into shadows, low micro-contrast so details feel hazy, and a slight color shift that reads as memory rather than reality. When you combine liminal emptiness with dreamy softness, the image stops looking like a place and starts feeling like a feeling.
The psychology behind why these images hit so hard is real. Researchers call it the uncanny response – a place we recognize but can’t quite place, which the brain tries to file as memory. That’s why a 2am car park or an empty mall escalator can feel more emotional than a busy street with people. The brain fills in what should be there, and the resulting mood is closer to nostalgia than observation.
The Three Ingredients That Create the Mood
- Empty + slightly off – a place designed for crowds, captured without them, plus lighting that feels a little wrong (too green, too yellow, too dim).
- Soft light with halation – the brightest parts of the image bleed outward, like your eyes are slightly out of focus.
- Low contrast + visible grain – shadows aren’t crushed, highlights aren’t blown, and there’s a faint texture that says memory instead of moment.
The 6-Step Dreamlike Liminal Photo Recipe
If you want a fast answer for how to make a photo look like a liminal space, this is the workflow I use. Each step takes about 90 seconds once you’ve done it a few times, and the order matters less than doing all six.
- Pick an empty transitional space. Hallways, stairwells, escalators, parking decks, waiting rooms – anywhere built for movement, not lingering.
- Wait for the light to go slightly wrong. Overcast afternoons, fluorescent-lit offices after hours, sodium-vapor streetlights at night – all of these give you the off-color mood for free.
- Add diffusion. A Black Pro Mist 1/4 filter on your lens, or the cheapest version: a UV filter lightly smeared with Vaseline around the edges. Phones can use the free Huji app or VSCO’s haze slider.
- Shoot into the light. Backlighting gives you free halation. Place the brightest source behind your subject (or behind the empty space) and meter for the shadows.
- Compose for symmetry and one vanishing point. Center the hallway, the stair, the row of lights. Negative space on either side of the empty subject makes the feeling stronger.
- Edit gently: drop Clarity and Dehaze, lift shadows, add a touch of grain and warmth. Concrete slider values are in the editing section below.
Best Locations to Find Liminal Spaces
The biggest mistake beginners make is waiting for an abandoned place. Real liminal spaces are everywhere – they just have to be empty. I have scored some of my favorite shots in a 24-hour grocery store at 6am, a hotel corridor at 11pm, and a public library on a Sunday morning. Here are the most reliable categories, ranked by accessibility.
Easy Access, Day or Night
- Hotel corridors on upper floors late at night – patterned carpet, repeating doors, fluorescent or warm wall sconces.
- Underground parking decks – the painted lines and concrete pillars already feel transitional.
- Empty mall corridors after closing hours (check with security – many malls allow photographers before 7am).
- Stairwells in apartment buildings, hospitals, or office blocks during off-hours.
- Subway platforms and tunnels during slow periods – early Sunday morning is best.
- Airport terminals at off-peak hours, especially the connector walkways between gates.
Harder Access, Higher Reward
- Abandoned malls and schools – check with the owner, never break in. Some states require written permission even for photography.
- Empty swimming pools out of season – the painted lanes and drained basins are perfect.
- Foggy streets at 3am – any residential street becomes liminal after a heavy fog.
- 24-hour laundromats at 4am – the rows of dryers and soft overhead light are cinematic gold.
One quick safety note: if a place requires breaking in, climbing a fence, or trespassing past no-trespassing signs, find another spot. The genre is about mood, not edge. Most of my favorite liminal shots are in places with security guards and free coffee.
Gear That Creates the Dreamlike Look
You can shoot liminal photos with anything, but certain gear makes the dreamy quality easier. The dreamlike look depends on halation (light bleeding around bright edges), swirly bokeh (out-of-focus areas that aren’t perfectly smooth), and slightly soft contrast. Three gear categories give you these for free.
Lenses That Naturally Look Dreamy
Modern mirrorless lenses are sharp and clinical – the opposite of what you want here. Vintage lenses are your friend because their coatings are less aggressive, which produces natural halation and swirly bokeh.
- Helios 44-2 – the famous Soviet 58mm f/2. Manual focus only, but its swirly bokeh is the single most “dreamlike” lens you can buy on a budget. Mounts are available for Sony E, Fuji X, Micro Four Thirds, and Canon EF.
- Vintage 50mm f/1.4 or f/1.7 from the 1970s-90s – Canon FD, Nikon AI-S, Pentax K, or Minolta MD. Look for the words halation or veiling glare in reviews.
- Voigtländer Nokton or Classic lenses – German/Japanese manual focus glass with character. More expensive but built like tanks.
- Anamorphic adapters – clip-on anamorphic lenses from SLR Magic or Moondog Labs (for phones) add horizontal flares and oval bokeh.
Diffusion and Mist Filters
A diffusion filter is the single biggest shortcut. It physically scatters light at the brightest points of your image, giving you the halation that takes 20 minutes to fake in Photoshop.
- Tiffen Black Pro Mist 1/4 – the industry standard for dreamy film and music video work. Subtle enough to use in daylight.
- Tiffen Glimmerglass 1 – similar effect, slightly more sparkle on highlights.
- Hoya Mist filters – cheaper alternative with similar results at lower intensity.
- DIY option – a clear UV filter with a thin smear of petroleum jelly around the edges (not the center). Free, but it looks exactly like a cheap filter.
Phone-Only Workflow
If you’re shooting on iPhone or Android, you don’t need any of the above. Modern phone cameras already produce plenty of softness, and the apps handle the rest.
- Huji Cam – free app that adds film grain, light leaks, and date stamps. Single tap for the whole dreamy effect.
- VSCO – the Haze and Grain tools at low values nail the dreamlike look without obvious filters.
- Lightroom Mobile – the full Lightroom desktop recipe works on phones, with the same slider names.
- Long exposure mode – on iPhone, switch to Live Photo and pick Long Exposure for empty-people crowd shots in busy areas.
Composition: Symmetry, Leading Lines, Negative Space
Composition is what separates a snapshot of an empty hallway from a liminal photograph. The rule is simple: when there’s nothing in the frame, the frame itself becomes the subject. Three composition patterns work best for liminal spaces.
Symmetry and One-Point Perspective
Place your camera dead-center on a hallway, escalator, or row of lights. The vanishing point becomes the emotional anchor of the photo. Slight imperfections – one crooked door, one flickering light – make the symmetry feel human instead of computer-generated. A bubble level on your hot shoe (or a 30-cent level taped to your phone) keeps things straight.
Leading Lines
Lines that pull the eye into the frame are how you signal “this is a place to walk through.” Train tracks, handrails, floor tiles, ceiling beams, painted lane markers – any repeating line works. Position yourself so the strongest line starts at a corner and exits at the opposite corner. That diagonal tension is what gives liminal images their quiet unease.
Negative Space
When the subject is empty space, give it room. Crop tight and the image feels like a missing piece of something. Crop loose and the emptiness becomes the point. For most liminal shots, leave more room around the subject than feels natural. The frame should breathe.
What to Leave Out
This part is as important as what you include. Skip:
- People, even in the distance – one figure turns liminal into street photography.
- Logos, brand names, and EXIT signs that are too crisp – they yank the image back to the present.
- Modern phones or screens – they’re too modern for the mood.
- Anything red, blue, or saturated – the genre lives in yellows, greens, and muted tones.
Lighting: Backlighting, Soft Window Light, and Fog
Light is the single biggest contributor to whether your image feels dreamlike. The same hallway under fluorescent tubes at noon will feel completely different from the same hallway at sunset through a back door. Three lighting setups give you reliable liminal results.
Backlighting
Backlighting means placing the brightest light source behind your subject (or your empty space) and exposing for the shadows in front. The result is glowing edges around every shape, soft halos around light bulbs, and a feeling that the light is leaking in from somewhere you can’t see. This is the technique that almost every dreamlike liminal photo uses.
To shoot backlit: meter for the foreground (the dark side of the scene), let the highlights blow out slightly, and let the camera render the bright edges as soft halos. If your camera has a highlight warning, turn it on so you can see when you’re pushing the brightness.
Soft Window Light
Window light at 90 degrees to your subject gives you the soft glow that flatters liminal spaces. The trick is to wait for overcast weather – direct sun creates hard shadows that fight the dreamy mood. A bright overcast day turns any indoor space into a giant softbox. Best time is 10am to 2pm when the sun is high and the clouds are thick.
Fog, Mist, and Atmospheric Haze
Fog is the cheat code of liminal photography. Even moderate fog softens every edge, drops contrast, adds depth to empty streets, and turns ordinary scenes into cinema. Most cities get 5-10 foggy nights a year, and those nights produce about 80% of the genre’s best images. Check your local weather app for “visibility under 1km” conditions and head out with a 35mm or 50mm lens.
If you can’t wait for fog, a $15 hand-held fog machine (the kind used for Halloween) works for outdoor shots at golden hour. For indoor shots, theatrical fog juice and a small fogger at floor level creates the Backrooms-style haze that defines the genre.
Lighting Conditions Comparison
| Condition | Mood Produced | Best For |
|---|---|---|
| Overcast daylight | Soft, even, neutral | Indoor liminal spaces, daytime exteriors |
| Golden hour | Warm, nostalgic, dreamy | Outdoor hallways, parking decks, foggy streets |
| Blue hour (after sunset) | Cool, eerie, transitional | Office corridors, mall exteriors |
| Fluorescent overhead | Green-yellow, uncanny | Empty offices, schools, hospitals |
| Sodium-vapor streetlights | Orange, retro, dreamlike | Car parks, alleyways, late-night streets |
| Neon signage | Cinematic, vapor-wave | Asiatic restaurants, motels, downtown alleys |
Camera Settings for Day, Night, and Indoor Liminal Shots
Dreamy liminal photos don’t need razor-sharp technical settings. In fact, slightly imperfect settings – a touch of motion blur, a bit of grain, slightly soft focus – help the mood. But you still need to nail exposure and depth of field. Here are the settings I use for the three most common scenarios.
Daytime Outdoor Liminal
- Aperture: f/5.6 to f/8 (keeps the whole scene in focus, lets the diffusion filter do the softness work)
- Shutter: 1/250s or faster (handheld safe, lets you catch fleeting empty moments)
- ISO: 100-400 (low noise, low grain – we’ll add grain in editing)
- White balance: Cloudy or Shade preset (warms the image, starts the dreamlike color grade in-camera)
Nighttime Outdoor Liminal
- Aperture: f/1.8 to f/2.8 (lets in more light, swirly bokeh from vintage lenses shows up at this aperture)
- Shutter: 1/60s handheld, 1-4s on a tripod (the longer shutter lets moving people disappear from your scene)
- ISO: 800-3200 (some grain helps here – don’t fight it)
- Focus: manual focus set to hyperfocal distance for the scene
Indoor Liminal (Offices, Hallways, Malls)
- Aperture: f/2 to f/4 (shallow enough for halation, deep enough for the room to feel like a space)
- Shutter: 1/30s on tripod, 1/125s handheld
- ISO: 800-1600
- White balance: Tungsten preset (around 3200K) – this corrects fluorescent green into something usable and warm
One general rule: if you’re not sure whether to add more grain in editing, slightly underexpose instead. The shadows you lose to underexposure look more natural than the ones you crush in post.
Editing Workflow: Lightroom and Phone Apps
Editing is where 80% of the dreamlike effect actually happens. The in-camera capture gets you maybe 20% of the way there. The remaining 80% is a handful of sliders in Lightroom (or Lightroom Mobile) that you can apply in under two minutes. Here is the recipe I use for every liminal shot, with specific starting values. Adjust to taste.
Lightroom Desktop Recipe
- Exposure: +0.10 to +0.30 – lift it slightly so the image feels airy.
- Contrast: -15 to -25 – lower contrast is the single biggest dreamy change.
- Highlights: -40 to -60 – bring back the bright areas the diffusion filter blew out.
- Shadows: +30 to +50 – open the shadows so details feel hazy rather than hidden.
- Whites: +20 – adds the airy, lifted feeling of memory.
- Blacks: -10 – keeps some depth so the image doesn’t go flat.
- Clarity: -20 to -30 – the second biggest change. Lower clarity softens midtone edges.
- Dehaze: -10 to -15 – just a touch. Heavy dehaze kills the dreamlike mood.
- Vibrance: +10 to +15 – selective color boost that helps yellows and greens pop without going Instagram.
- Saturation: -10 – lower overall saturation so colors feel memory-like.
Color Grading (in the Color Mixer or Color Grading panel)
- Shadows: shift toward teal/cyan (hue +30, saturation +10)
- Highlights: shift toward warm yellow (hue +50, saturation +10)
- Midtones: leave neutral or shift very slightly toward green
Effects Panel
- Grain: Amount 25, Size 30, Roughness 50 – visible but not distracting.
- Vignette: Amount -20, Midpoint 50 – subtle darkening at the corners to draw the eye to the empty center.
Phone-Specific Recipe (Lightroom Mobile)
Same slider names, slightly different values for the smaller sensor look:
- Clarity: -25, Dehaze: -10, Contrast: -20
- Shadows: +40, Highlights: -50, Whites: +15
- Grain Amount: 30 (phones need a touch more grain)
- Apply the Huji app on top if you want extra film character.
Free Apps That Get Close
If you don’t want to learn Lightroom, these apps handle most of the heavy lifting for you:
- VSCO (free tier) – the Haze and Grain tools, plus the G3 and G6 film presets.
- Huji Cam (free) – one-tap film look with grain and light leaks.
- Snapseed (free) – the Drama and Glamour Glow tools in combination work well.
- RNI Films (paid, ~$5) – the most film-accurate mobile presets available.
Common Mistakes That Kill the Dreamlike Look
After looking at hundreds of submissions on r/liminalspace, I’ve seen the same five mistakes over and over. Avoid these and you’re already ahead of 90% of the genre.
- Over-editing – if your image looks like it has a heavy Instagram filter from 2014, you’ve gone too far. Dreamlike liminal feels found, not processed.
- Too much clarity and texture – high clarity fights the soft, hazy mood. Keep it under -15.
- Saturated colors – the genre lives in muted yellows, greens, and faded blues. Boost saturation and you leave the dream behind.
- People in the frame – even one distant figure changes the image from liminal to street photography. Use long exposure to remove them, or wait.
- Cropping too tight – liminal spaces need room. If your subject fills the frame, you lose the empty transitional feeling that defines the genre.
Bonus mistake: shooting at noon in direct sunlight. Harsh midday light kills the mood before you even press the shutter. If you only have time at noon, work entirely indoors where the windows act as softboxes.
Frequently Asked Questions
How to make a photo look like a liminal space?
To make a photo look like a liminal space, shoot an empty transitional place (hallway, stairwell, parking deck) using soft light, backlighting, and a diffusion filter. Edit the image by lowering Clarity and Dehaze, lifting the shadows, and adding visible grain. The combination of emptiness plus dreamy softness is what makes the result feel liminal rather than just empty.
How to get the dreamy effect on photos?
The dreamy effect comes from reducing micro-contrast and adding halation around bright edges. In Lightroom, drop Clarity by 20-30, lower Dehaze by 10-15, lift shadows by 30-50, and add a touch of grain at Amount 25. In-camera, attach a Black Pro Mist 1/4 diffusion filter or shoot through a window for free halation.
How to shoot liminal photography on a phone?
To shoot liminal photography on a phone, use Huji Cam or VSCO for the dreamy filter, switch to Long Exposure mode to remove people from busy areas, and shoot in soft light (overcast days or fluorescent-lit interiors). Edit in Lightroom Mobile by dropping Clarity to -25, lowering Dehaze to -10, and adding grain at Amount 30. Phone cameras are excellent for the genre because their built-in softness already feels nostalgic.
What camera settings work best for dreamy liminal photos?
For dreamy liminal photos, use a wide aperture (f/1.8 to f/4) for shallow depth of field and visible halation, an ISO between 100 and 1600 to keep grain natural, and a shutter speed of 1/30s or longer to allow moving people to disappear from the frame. Set white balance to Cloudy or Tungsten to warm the image in-camera. Slightly underexpose rather than rely on editing to recover shadows.
What is the backlight photography technique?
Backlighting means placing the brightest light source behind your subject and exposing for the darker foreground. The result is glowing edges around every shape, soft halos around light bulbs, and a feeling that the light is leaking in from somewhere off-frame. For liminal photography, backlighting is the most reliable way to create the dreamy halation that defines the genre.
How to get fog effect in photos without real fog?
To fake fog in post, add a soft white layer with low opacity over the brightest part of the image, then mask it so it only affects the distance. In Lightroom, push Dehaze to -50 in a Linear Gradient filter on the background only. For real fog, watch your local weather app for nights with visibility under 1km, or use a small theatrical fog machine at floor level for indoor Backrooms-style haze.
Final Thoughts: Start Shooting Today
The fastest way to learn how to shoot dreamlike liminal space photos is to pick one location within walking distance of your home and shoot it three times in three different lights. Empty parking deck at noon, again at golden hour, again at 11pm under sodium lights. You’ll see the same scene transform, and you’ll start to feel which conditions give you the mood for free.
Once you have a few frames you’re proud of, post your strongest one to r/liminalspace. The community responds well to photos that feel found rather than staged, so resist the urge to over-edit. The mood matters more than the gear, and your phone is enough to start. Go shoot something liminal today.