
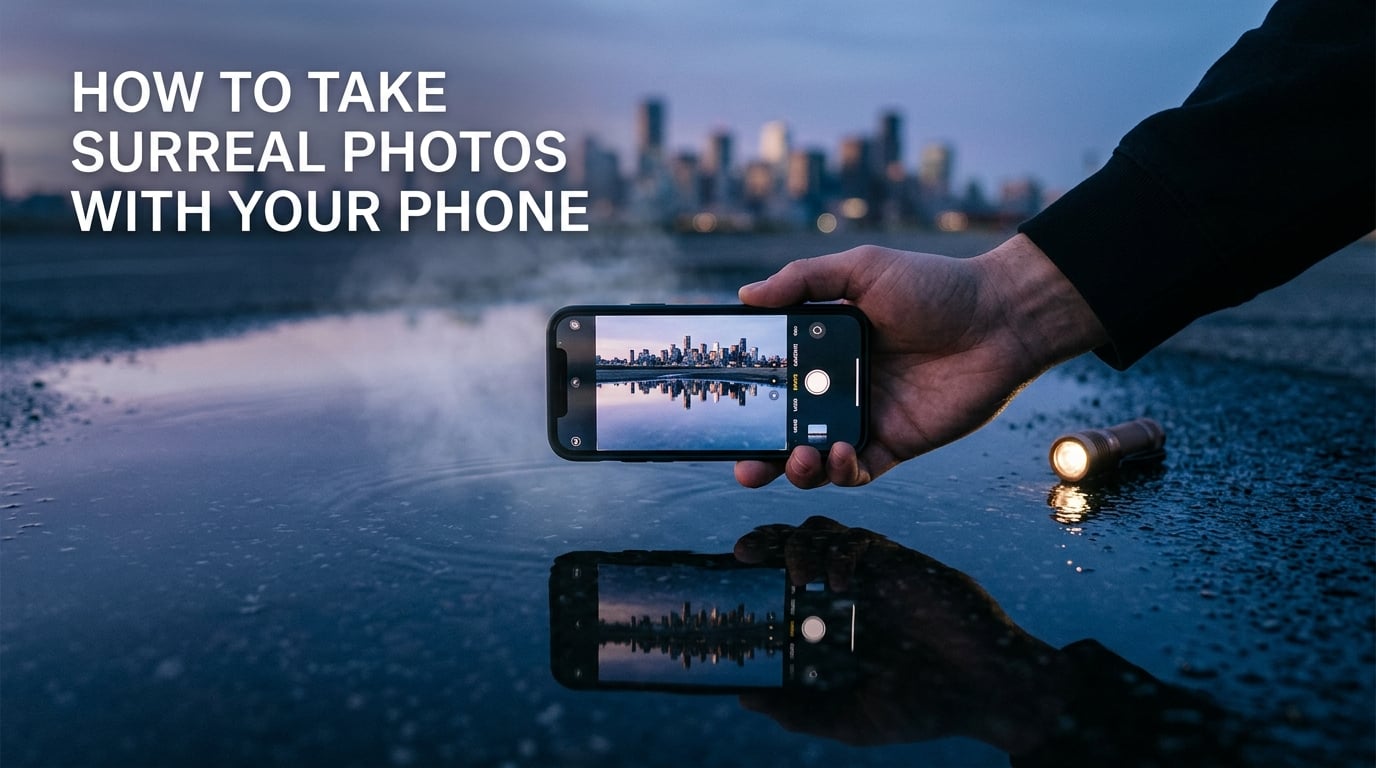
Surreal photography is a style that captures dreamlike, uncanny, or impossible scenes by bending everyday reality – through odd angles, reflections, long exposures, and creative editing.
If you want to know how to take surreal photos with your phone, this guide walks you through ten techniques you can shoot tonight, the free apps that get you 80 percent of the look, and a step-by-step editing walkthrough. Every method here works on iPhone and Android, no tripod or DSLR required.
Table of Contents
Techniques at a Glance: How to Take Surreal Photos With Your Phone
Here are the ten phone-native surreal techniques we cover in this guide. Start with the easy ones, then level up as your confidence grows.
- Clean your lens and turn on gridlines (the fastest surreal upgrade).
- Force perspective by moving your subject closer or farther.
- Shoot reflections in puddles, mirrors, and glass.
- Create double exposure using your phone’s built-in mode.
- Paint with light using a small flashlight in a dark room.
- Try long exposure through Live Photo or Pro mode.
- Make a subject float by photographing them mid-jump.
- Add motion blur with a slow shutter or shaky hand on purpose.
- Use fog, smoke, or steam for instant atmosphere.
- Switch to black and white or push one color to full saturation.
What Is Surrealism Photography, Exactly?
Surrealism photography is a genre that makes viewers feel like they walked into a dream. Images often look uncanny, playful, or impossible – a giant hand plucking a person off the street, two faces merged into one, a building floating above its reflection.
The movement traces back to the 1920s and 1930s, when artists like Man Ray, Philippe Halsman, and André Kertész used darkroom tricks and carefully staged tableaux to imitate dream logic. Today, the same spirit lives on Instagram, in fine-art prints, and in the camera app on every phone.
What separates surreal photos from regular snapshots is intent. A good surreal photo asks the viewer to pause and ask, “How did they do that?” You can achieve that pause with a single odd angle, a clever reflection, or a layer of surreal photo editing.
Quick-Start Phone Settings for Surreal Shots
Before you chase reflections or paint with light, give your phone the best starting conditions. These four settings unlock most of the dreamlike look people share on Instagram.
Clean your lens. A microfiber cloth takes two seconds and instantly sharpens every shot. Reviewers on Reddit’s r/PhotographyAdvice say this is the single biggest upgrade they make.
Turn on gridlines and level. Most modern phones let you overlay a 3×3 grid and a horizon level in the camera settings. Gridlines help you align reflections, while the level stops tilted horizons from ruining an otherwise perfect shot.
Shoot in Pro or Manual mode. If your Android has Pro mode (most Samsungs and Pixels do), use it to drop shutter speed to one second or longer for light trails and silky water. iPhone owners can use the Halide or ProCamera app for the same control.
Lock exposure and focus. Long-press the subject on screen to lock AE/AF. This stops your phone from re-exposing mid-shot, which matters when you stack double exposures or hold a flashlight steady.
Use Portrait Mode creatively. Portrait Mode creates a shallow depth of field that mimics a fast DSLR lens. Pull a subject forward, blur the background into a soft wash, and you already have a dreamy, surreal edge.
10 In-Camera Surreal Techniques You Can Shoot Tonight
Each technique below includes a difficulty rating – Easy, Medium, or Hard – so you can pick a starting point that matches your comfort level.
1. Forced Perspective (Easy)
Forced perspective makes nearby objects look giant and far ones look tiny. Hold a coffee mug close to the lens and have a friend “drink” the moon. Stand at the end of a corridor and make your subject look miniature against the vanishing point.
Keep the phone level and resist zooming in. The illusion collapses the moment digital zoom stretches the perspective.
2. Reflections (Easy)
Reflections turn any puddle, mirror, window, or polished phone screen into a parallel world. Shoot a building reflected in a rain puddle, tilt the camera 180 degrees, and you have a city floating under your feet.
Get low. The closer the lens is to the reflective surface, the stronger the mirror effect. For glass, press the lens gently against the pane to banish the photographer’s reflection.
3. Double Exposure (Medium)
Double exposure layers two images into one ghostly composite. Many iPhones and Androids now include this as a built-in camera mode – search your camera app for “Multiple Exposure,” “Photo Booth,” or “Live Photo + Long Exposure.”
Shoot a dark silhouette first (a tree, a portrait against bright sky), then a textured scene (leaves, water, clouds). Stack them and the bright areas of the second image show through the dark areas of the first.
4. Light Painting (Hard)
Light painting uses a slow shutter and a moving flashlight, LED wand, or sparkler to draw shapes in mid-air. Reviewers on r/photography confirm that phones handle this surprisingly well with a 10-second shutter in a dark room.
Mount the phone on a stack of books, switch to Pro mode, drop the shutter to 10 seconds, ISO low, and “write” your shape with a flashlight. Wear dark clothes and stay out of the frame.
5. Long Exposure (Medium)
Long exposure turns moving water into mist and trails of cars into ribbons of light. On iPhone, open the camera, swipe to Live Photo, then long-press the thumbnail and choose “Long Exposure.” On Android, use Pro mode with a 1 to 4 second shutter.
For longer exposures beyond 4 seconds, you will need a small phone tripod or a steady ledge.
6. Floating Subject (Medium)
The classic levitation trick. Have your subject jump, snap a burst at the peak, and pick the sharpest frame. Then shoot the same empty scene and mask out the jump in any free app.
Stairs, beds, and park benches make great launchpads. The cleaner the background, the easier the masking.
7. Motion Blur (Easy)
Intentional motion blur turns a static subject into a feeling. Pan the camera with a moving subject, or wave the phone on purpose during a 1-second shutter.
Use it on dancers, cyclists, or anyone wearing a flowing dress. The result looks like a single breath caught in fabric.
8. Fog, Smoke, and Steam (Easy)
Atmosphere is the cheapest surreal tool you own. Steam from a kettle, cigarette smoke, foggy mornings, or even dry ice in water can retexture an entire scene.
Backlight the haze with a phone flashlight for the strongest effect. The light catches every particle and turns a plain kitchen into a dreamscape.
9. Color Manipulation in Camera (Easy)
Color choices carry as much surreal weight as any trick. Shoot a single colored object against a neutral scene, then desaturate the background. Or push one hue – all the reds, all the blues – until the world feels off-balance.
Most phones now ship with a Black & White mode in the camera filters. A high-contrast monochrome shot is one of the oldest surrealist looks, used by Kertész in the 1930s.
10. Black and White Contrast (Easy)
Hard shadows, bright highlights, no color distractions. Black-and-white photography strips a scene to shape and light, which is exactly what surrealism wants.
Shoot into the sun, shoot under a single lamp, or wait for a window with a slatted blind. The stripes of light across a face are pure surreal poetry.
Technique Picker: Find the Right Effect Fast
| Technique | Best For | Phone Feature | Difficulty |
|---|---|---|---|
| Forced perspective | Funny illusions | Standard camera | Easy |
| Reflections | Parallel worlds | Standard camera | Easy |
| Double exposure | Ghostly portraits | Multiple Exposure mode or app | Medium |
| Light painting | Writing in the air | Pro mode + tripod | Hard |
| Long exposure | Silky water, light trails | Live Photo / Pro mode | Medium |
| Floating subject | Levitation portraits | Burst mode + free editor | Medium |
| Motion blur | Dancers, cyclists | Slow shutter or Live Photo | Easy |
| Fog, smoke, steam | Atmospheric mood | Standard camera + backlight | Easy |
| Color manipulation | Unreal color worlds | Filter + free editor | Easy |
| Black and white contrast | Surrealist classic | B&W filter or app | Easy |
The Best Free Surreal Photo Editing Apps for Phones
Editing is where most surreal photos are finished. These four apps cover 90 percent of what you need – and they are all either fully free or have a generous free tier.
| App | Platform | Free vs Paid | Best For |
|---|---|---|---|
| Snapseed | iOS, Android | Fully free | Selective tweaks, double exposure, healing |
| VSCO | iOS, Android | Free tier + paid presets | Film-like color and grain |
| PicsArt | iOS, Android | Free tier + subscription | Compositing, stickers, masks |
| Lightroom Mobile | iOS, Android | Free tier + subscription | Color grading and RAW edits |
Snapseed is the one app I would keep if I could only keep one. It is 100 percent free with no ads, made by Google, and it has a Double Exposure tool, a Selective brush, and a Healing tool that fixes the little dust spots and skin marks that would otherwise pull your eye out of the dream.
VSCO is where you go for moody, film-inspired color. Free presets mimic Kodak Portra and Fuji 400H, which give skin tones a soft, lifted look that flatters surreal portraits.
PicsArt handles the heavy compositing. If your concept needs two photos pasted together – a real head on a painted sky, a giant hand stealing a person – PicsArt’s cutout and layer tools do the job without a learning curve.
Lightroom Mobile is the choice for serious color grading and RAW capture. The free tier includes curves, color mixers, and selective edits. If you plan to shoot in RAW, this is where you finish the file.
Before and After: Editing a Surreal Shot in Snapseed
Here is how I would turn a plain puddle reflection into a surreal floating-city shot, using only Snapseed.
Step 1. Open the puddle shot in Snapseed. Tap Tools, then Crop, and straighten the horizon. A level horizon is the difference between a casual snapshot and a composed image.
Step 2. Open Tune Image. Drop Highlights by 30, lift Shadows by 25, and add +15 to Ambiance. The reflection now reads as a sky, not a dark puddle.
Step 3. Open White Balance. Push the temperature cooler – around minus 20 to minus 30 – to push the reflection toward dawn blue.
Step 4. Open Details and add +20 Structure. The texture in the water now looks painterly, almost like brush strokes.
Step 5. Open Vignette and add a soft dark vignette at minus 25. The eye is pulled into the center, where the floating city lives.
The whole edit takes about 90 seconds. The original was a clean photo with nothing surreal about it. The finished image now reads as a city hovering above its own mirror.
10 Surreal Concepts to Try This Week
Concept-first, technique second. Pick one and let it pull you outside for a shoot.
- A person peeling off their own face to reveal the sky behind it.
- A house growing out of a flower pot on a city sidewalk.
- Rain falling upward from a puddle into the clouds.
- A friend carrying a tiny version of themselves on their shoulder.
- A doorway opening onto a desert instead of a bedroom.
- A coffee cup pouring a galaxy instead of milk.
- A book whose pages turn into birds mid-flip.
- A reflection walking in the opposite direction from its person.
- A shadow that has grown up and left its owner behind.
- A pair of shoes standing on their own in an empty street at midnight.
If a concept feels hard, lower the bar. A friend “holding” the moon is the same idea as peeling a face – both place impossible things next to real things and let the photo do the lying.
Common Mistakes That Kill the Surreal Effect
These are the five errors that flatten a surreal image faster than anything else.
Over-editing. If the colors look like a cartoon, the brain stops believing. Aim for edits that feel plausible if you had seen them in real life. Surreal does not mean obvious.
Sloppy perspective. Forced perspective only works when the vanishing lines line up. If your giant hand casts the wrong shadow, the trick breaks. Match light direction across both elements.
Unleveled horizons. A tilted horizon reads as a mistake, not as surrealism. Use the level tool in your camera or fix it in Snapseed before you export.
Missed reflections. If a puddle reflection is upside down, you are holding the phone upside down. Flip the camera 180 degrees so the reflection sits in the lower half of the frame and reads correctly.
Concept-less technique. A reflection with nothing to say is just a reflection. Pick the story first, then choose the technique that tells it.
Surrealism Etiquette: Photographing People With Real Consent
Surreal portraits of friends and strangers raise questions that pure landscape shots do not. Before you ask someone to leap, levitate, or peel their face off in public, agree on the basics.
Show them the planned shot on your phone, not just the idea in your head. People change their minds faster when they can see the composition. Credit them in the caption if the photo ends up on a feed with followers. And if a stranger walks into your “empty” puddle reflection or empty stairwell, that is real life happening and it deserves the same respect any other photo of a person would.
Community advice on Reddit threads about creative portrait photography keeps returning to the same line – keep the shoot short, share the image, and never post a surreal version of someone that you would not show them in person.
Frequently Asked Questions
How to make a photo surreal?
Start by choosing one impossible concept – a floating object, a doubled face, a reflection that leads somewhere else. Then pick a single technique that supports it: forced perspective, double exposure, reflection, light painting, or surreal photo editing in an app like Snapseed. A strong surreal photo comes from a clear concept before the technique, not the other way around.
What are some tricks for taking amazing pictures with my cell phone?
Clean the lens first, turn on gridlines and the level tool, and lock exposure and focus by long-pressing your subject. Shoot at golden hour or in soft window light, hold the phone with both hands or rest it on a stable surface, and stay close to your subject instead of zooming. For low light, drop to Pro mode with a one-second shutter and low ISO. Reviewers consistently call a steady hand or a small tripod the single biggest upgrade.
How to take aesthetic photos with a phone?
Stick to soft natural light, neutral backgrounds, and a single focal point. Use Portrait Mode for shallow depth of field, leave negative space around your subject, and finish in Snapseed with a gentle drop in highlights and a small lift in shadows. A consistent color tone – all warm or all cool – gives a feed a cohesive aesthetic look without much work.
What app is everyone using to edit their photos?
Snapseed is the most-used free editor because it has no ads and no subscription. Beyond Snapseed, creators lean on VSCO for film-like presets, Lightroom Mobile for color grading, and PicsArt for compositing two images together. Most surreal edits can be done with Snapseed alone, especially its Double Exposure and Selective tools.
What are the best photo editing apps for phones?
Snapseed is fully free and covers most needs including double exposure and selective healing. VSCO is best for film-inspired color presets. Lightroom Mobile is the strongest free tier for RAW files and color grading. PicsArt is the top free choice when you need to composite two photos into one surreal scene.
What is the best truly free photo editor app?
Snapseed is the best fully free photo editor on phones in 2026. It is made by Google, has no ads, no subscription, and no hidden paywalls. Its tools include Double Exposure, Selective brush, Healing, HDR, and full White Balance control – enough to finish most surreal edits without paying anything.
What is the best app for aesthetic photo editing?
VSCO is the best app for an aesthetic, film-inspired look because its presets mimic real Kodak and Fuji film stocks. For a cleaner modern feed, Lightroom Mobile gives you precise control over color mixers and curves. Both have a useful free tier and pair well with Snapseed for finishing touches.
Can you take surreal photos with a phone?
Yes. Modern phones have all the features surreal photography needs: Portrait Mode for shallow depth of field, Live Photo for long exposure, Pro or Manual mode for slow shutter speeds, and built-in multiple exposure on several models. Combined with free apps like Snapseed, VSCO, and PicsArt, a phone can produce surreal photos that match what a DSLR would have done a decade ago.
Final Frame: Your Surreal Photo Starts With One Weird Idea
Knowing how to take surreal photos with your phone is mostly a matter of deciding what impossible thing you want to be true. Pick one concept from the idea bank above, walk outside with a clean lens and a 30 percent charged battery, and shoot until the trick lands.
The techniques in this guide are old – Man Ray was doing double exposure in the 1930s. What is new in 2026 is that every one of them lives inside the camera you already own. No DSLR. No Photoshop. No permission slip.
Start with the easy techniques tonight, finish your favorite shot in Snapseed, and post it. The dream is closer than you think.