
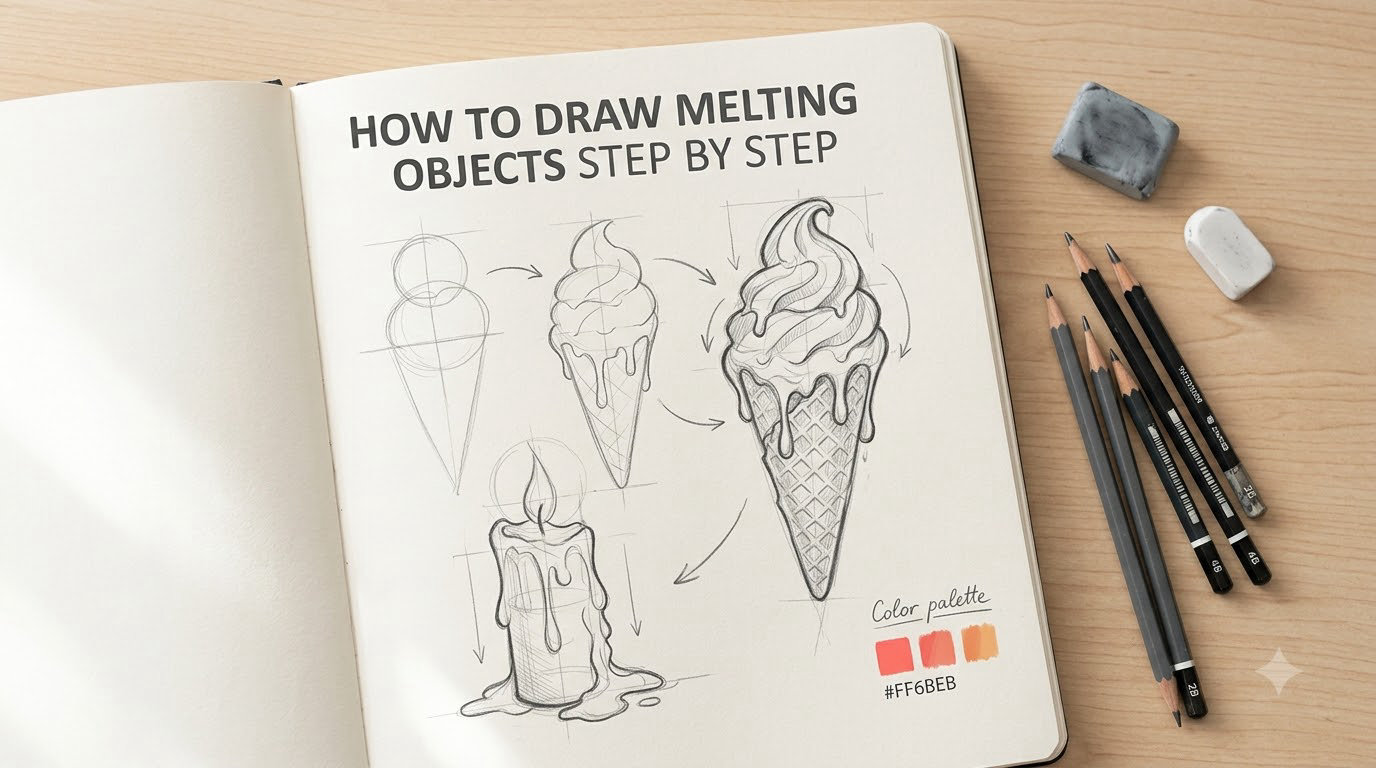
If you have ever stared at Salvador Dali’s The Persistence of Memory and wondered how to make objects droop, drip, and pool on the page, you are in the right place. I spent the last several weeks sketching melting candles, cubes of ice, and a clock that refused to sit flat, and what I found is that the magic is mostly physics plus patience.
This guide on how to draw melting objects step by step walks you through the exact process I use, from the first bounding box to the final droplet of shading. It is built for beginners who can hold a pencil and intermediate artists who want a systematic method. We will cover the physics behind dripping shapes, the supplies that make texture rendering easier, the core tutorial itself, object-specific techniques, and the common mistakes I made so you do not have to.
By the end, you will have a repeatable workflow for any melting subject, plus a checklist of fixes for the most common beginner frustrations.
Table of Contents
What Is the Melting Effect in Drawing?
The melting effect in drawing is a surrealist technique where solid objects appear to be liquefying, dripping, or drooping as if heat or gravity has turned them into something soft. You will see it everywhere in Daliesque art, from clocks sagging over tree branches to faces sliding off skulls. An example would be a cube of butter bending at the corners and sliding off a plate, or a clock face sagging like warm cheese at room temperature.
I think of it as a lie told with shading. The object is structurally the same as the original, but the contour lines and shadows are redrawn to suggest liquid behavior. Once you see it that way, the technique stops feeling mysterious and starts feeling like a set of choices you can make on purpose.
Why the melting effect works visually
The brain reads an object as solid based on its silhouette, surface tension, and shadow. When you soften one or two of those cues while keeping the others intact, the viewer accepts the object as half-liquid. That tension between solid and liquid is what makes melting drawings feel dreamlike instead of cartoony.
The Physics of Melting: Gravity, Viscosity, and Flow
Most tutorials skip this part, which is exactly why their drips look fake. Before you draw a single drip line, you need to understand three physical ideas: gravity, viscosity, and surface tension. These are the rules your eye expects, even if it cannot name them.
Gravity sets the direction
Every drip in a real melting scene falls straight down from its source. A drip that points sideways reads as wrong because our visual memory of melted things always points toward the floor. When I plan a melting drawing, I draw a faint vertical line first and align each distortion to it.
Viscosity controls drip length
Thin liquids like water form short, fast drips. Thick liquids like wax or chocolate stretch into long, lazy droops. Before you sketch a drip, ask yourself how thick your melting object would be. Cold butter droops slowly. Hot chocolate races downward. That single decision changes every shape you draw.
Surface tension rounds the bottom
Liquid clings to the surface it sits on, then pulls into a rounded bead before it drops. Reddit artists on r/Hylics put it simply: round out the drip lines at the end, because the top of a drip clings while the bottom rounds as gravity pulls a drop down. If you taper your drips to sharp points, your drawing will instantly look like plastic instead of liquid.
Flow direction matters
Real melting follows paths of least resistance. Liquid flows around corners, pools in dents, and slides off raised edges. When you add melting to a face, you should follow the cheekbones, brow, and jaw. When you melt a cube, flow happens at the lowest corner first. Following real flow is the difference between believable and random melting.
Materials and Setup for Drawing Melting Objects
You do not need much to start, but the right pencils make texture rendering much faster. Here is the kit I keep within arm’s reach whenever I sit down to draw melting things.
- Graphite pencils in 2H, HB, 2B, 4B, and 6B – hard pencils for light sketch lines, soft pencils for deep shadow and pool areas.
- Mechanical pencil (0.5 mm) – great for crisp contour lines on the original object before distortion.
- Kneaded eraser – lifts highlights cleanly and shapes the rounded tops of drip beads.
- Blending stump or tissue-wrapped finger – smooths gradients across curved melting surfaces.
- Smooth drawing paper (90 to 110 lb) – holds pencil layers without tearing under blending.
- Sketchbook or loose sheets – I prefer a wire-bound sketchbook so I can flip quickly through test drawings.
- Reference photo or real object – a melting candle on a desk or an ice cube on a plate works as your cheat sheet.
Set up near a window if you can. Side lighting helps you see your own shading mistakes as you draw, and it doubles as a great reference for how light pools on real melting things.
How to Draw Melting Objects Step by Step
This is the core workflow. I use it for every melting subject, from a single cube to a full surrealist scene. Each step includes a clear action verb so you can scan it quickly the first few times you practice.
- Step 1: Draw the bounding box of your original object. Sketch a simple box, cylinder, sphere, or face shape in light pencil. This becomes the skeleton your melting distortion will sit inside. Keep the lines loose and the proportions accurate.
- Step 2: Form the original object inside the box. Draw the object as it normally looks, with clean contour lines and basic proportions. Do not add melting yet. This step gives you a clean reference of what you are about to distort.
- Step 3: Identify the direction of gravity and the lowest point. Mark a faint vertical line through the center of the object. Find the corner, edge, or surface that gravity would pull liquid toward first. This is where the first drip begins.
- Step 4: Add slow distortion along the bottom edges. Redraw the lower contour lines so they sag downward in a smooth curve. Corners should soften. Flat surfaces should bow. Keep the top of the object nearly untouched for stronger contrast.
- Step 5: Draw drip lines that cling and round at the bottom. Sketch each drip as a shape that is wide where it meets the surface and rounded where the drop is about to fall. Vary drip thickness based on the viscosity of the material. Tapering to a sharp tip is the most common mistake.
- Step 6: Add a pooling base if the object is sitting on a surface. Where melted material collects on a plate, table, or floor, draw a flat puddle with a slightly raised center. Pooled liquid is what sells the illusion that the object has been melting for a while.
- Step 7: Render light and shadow to sell the liquid surface. Place your light source first. Then shade the side opposite the light, deepen the shadow under each drip, and add a soft highlight near the top of each pool. Curved liquid surfaces need curved gradient shading, not flat tones.
- Step 8: Finish with crisp contour accents and lift highlights. Use a sharp 2B pencil to redefine the edges where the original object still reads as solid. Use a kneaded eraser to lift a small bright highlight on the rounded bottom of each drip. That tiny bright spot is what makes the drip look wet.
Pause after step 4 the first time you try this. Look at the silhouette and ask whether it still reads as the original object. If yes, your distortion is convincing. If no, you have melted too much and should redraw a cleaner version of the original first.
Object-Specific Melting Techniques
Different materials melt differently, and recognizing the pattern for each one makes the whole process faster. These are the four objects I get asked about most often, and the adjustments that work for each.
How to draw a melting ice cube
An ice cube melts quickly and pools fast, so drips are short and the puddle is wide. Round all four corners aggressively, soften the bottom edge, and draw a wide flat pool that hugs the lower half of the cube. Add a couple of small splash drips inside the puddle to suggest fresh melt water. Keep the top of the cube almost square for contrast.
How to draw a melting candle
Wax is thick, so drips are long and lazy. Start with a tall rectangle, then let the top edge bow slightly inward as the wax softens. Draw two or three drips that stretch down at least a third of the candle’s height, each one clinging at the top and rounding at the bottom. Add a small pool of wax where each drip touches the surface.
How to draw a melting clock (Dali style)
A melting clock is a rectangle that sags over an edge. Start with a normal rectangle clock face, then let the bottom edge dip over the branch, shelf, or whatever it sits on. The clock numbers should bend with the curve rather than stay rigid. This is the classic Persistence of Memory look.
How to draw a melting face
Start with a standard portrait, then melt from the chin upward. Let the jaw droop and pool on the collarbone. Allow the cheeks to slide down, the nose to stretch, and the eyes to soften at the corners. The forehead should stay the most solid part of the face. Keep one feature fully intact so the viewer still recognizes the person.
How to draw a melting popsicle or ice cream
These melt fast and drip straight down. Draw a long rectangular or cone shape, then add three to five short fat drips running down the sides. Add a small puddle on the stick if it has one. Keep the stick or cone straight and rigid for visual contrast with the soft melting treat.
Common Mistakes and How to Fix Them
I made every one of these mistakes when I started, and so did the artists on Reddit and the Urban Sketchers Facebook group. Here is the shortlist of fixes.
- Drip lines taper to sharp points. This is the number one giveaway of an amateur melting drawing. Fix it by redrawing the bottom of every drip as a rounded bead. Reddit users on r/Hylics specifically advise rounding out drip lines because real liquid clings at the top and rounds at the bottom.
- Melting happens in random directions. If your drips point sideways or upward, the drawing will feel unstable. Fix it by establishing a single gravity line before you draw any distortion, then aligning every drip to it.
- The whole object melts uniformly. Real melting starts at the bottom and edges. Fix it by leaving the top of the object mostly solid and softening only the lower two thirds. The contrast is what sells the effect.
- Shading is flat across curved surfaces. Liquid surfaces curve, so your shading should curve too. Fix it by switching to a blending stump and following the contour of each drip with soft circular strokes.
- No highlight on the drips. Without a bright spot near the rounded bottom of each drip, the drip looks like painted plastic. Fix it by lifting a small highlight with a kneaded eraser after your shading is done.
- Original object is unrecognizable after distortion. If your melted clock no longer reads as a clock, you have gone too far. Fix it by redrawing the original in light pencil first and using it as a guide so key features stay readable.
Pick one mistake to fix per drawing session. Trying to address all of them at once usually leads to a stiff, overcorrected result.
Surrealist Context: From Dali to Your Sketchbook
Melting objects in art are not a novelty. They are a core surrealist tool used to question what we consider solid, stable, and real. Salvador Dali’s The Persistence of Memory (1931) is the most famous example, with its limp clocks draped over a tree branch and the edge of a table. Dali painted what he called hand-painted dream photographs, and the melting forms were his way of suggesting that time itself was soft.
Other surrealists built on the same idea. Max Ernst used dripping textures to suggest decay. Leonora Carrington painted melting figures into impossible rooms. Yves Tanguy shaped stones into organic forms that seemed to drip without ever being liquid. The tradition of distorted reality goes back even further in art history, to Gothic gargoyles and Mannerist paintings, but surrealism gave it a clear visual language.
When you draw melting objects today, you are joining that conversation. Each dripping cube or sagging clock face is a small argument that the everyday world is less solid than it appears. That is part of why surrealist art feels so fresh even decades later, and why practicing it on the page is genuinely fun.
Frequently Asked Questions
Can you provide an example of melting in a drawing?
A melting drawing example is a cube of ice whose corners have rounded and whose bottom edge has slumped into a small flat puddle on the table. Another common example is a clock face sagging over the edge of a shelf like warm cheese, the classic Daliesque look from The Persistence of Memory. In both cases the original object is still recognizable, but its contours sag and drip as if gravity has softened it.
How to draw simple things step by step?
Start by sketching a light bounding box with a 2H pencil so you do not press too hard. Draw the original object inside that box using clean contour lines, then decide where gravity will pull first. Soften the lower edges and add rounded drips. Finally, shade the side opposite your light source and lift a small highlight on each drip with a kneaded eraser.
What is the 50% rule in art?
The 50 percent rule in art is the idea that about half of your finished drawing should be light values and the other half should be mid to dark values, with only a small amount of pure white or pure black. It keeps your shading balanced so the drawing does not look flat or muddy. For melting effects, this rule helps you reserve enough dark shadow under each drip without losing the bright rounded highlights.
How to draw a melting face?
Begin with a standard portrait in light pencil, keeping the forehead and eyes crisp. Soften the jawline and let it droop downward, then stretch the cheeks and nose so they slide along the natural bone structure. Round the chin into a small pool that rests on the collarbone. Leave the eyes and brow mostly intact so the face still reads as a face, then add curved shading and a bright highlight on each drooping feature.
Final Thoughts on Drawing Melting Objects
Learning how to draw melting objects step by step is really about learning to see gravity, viscosity, and surface tension, then translating those ideas into contour lines and shading. The eight-step workflow in this guide gives you a repeatable method: bounding box, original form, gravity direction, soft distortion, rounded drips, pooling base, curved shading, and lifted highlights. Once those moves are in your hand, you can melt anything from a candle to a portrait.
Practice on three objects this week. A simple cube, a candle, and a clock face. Notice how each material behaves differently and let that observation shape your drips. If you want to share your work or see more surrealist drawing experiments, sketchbook practice is the fastest path to consistency.